Right now my left pinky is burning up like crazy. I just came back chopping peppers for salsa and curry and wow... definitely will have to wear a glove next time.
[Edit: Even after washing with soap the heat was still there (warm water made it worse...cold was better). I decided to spray rubbing alcohol and felt about 85% relief. When cooking and getting burnt, cold water helps but draws the heat inward. Alcohol brings out the heat from the body. Learned this technique from an old cook from NY.]
[Edit: The burn wasn't as bad, but still felt it. Mom's old remedy worked like a charm. Dunk the finger in a mix of water and baking soda (50:50). Baking soda detoxifies. All better! =)]
Wednesday, April 13, 2011
A Peek into FCI (French Culinary Institute)
 | |||
| It was harder than it seemed! |
I was mentally prepared for an intense demanding aggressive and "scary" chef instructor, but instead, I met a very charming nice hospitable informative chef. We were lucky. The pastry chef seemed friendly, but this other chef didn't seem all too chummy.
For the class we audited, I noticed that the students were extremely positive, eager to learn, helped another out, and over all a friendly bunch. Student to instructor ratio was 5:1 for this class. Other classes we passed by were maybe 10-15:1. This doesn't mean that there weren't people running around the kitchen lined with a bit of chaos. It was fast paced, standing 5 hours straight (I thought my knee caps were going to bust). BUT, this is very doable. There was even a pregnant lady. Student ages ranged from early 20s to early 40s. Each student also had their own "workstation", which includes personal cutting station, fridge, oven, and stove area. However, there's a lot of team work, especially during prepping time. Students divide work amongst themselves to set up all ready & measured ingredients. One student actually was out sick (won't get into detail), and so the team prepared and made his portion, in case he needed it for reference for their final. Near the end, everyone worked together to clean up, wash dishes, sanitize the area, and call it a night. Leftovers are always enjoyed by students during and after the cookout.
Enough of chit chat, below are some pictures from the class:
 |
| Strictly using All Clad pots and pans. |
Sweet Roll Prep
 |
| Chef adding flour for non-stick action. |
 |
| Chef showing to roll. |
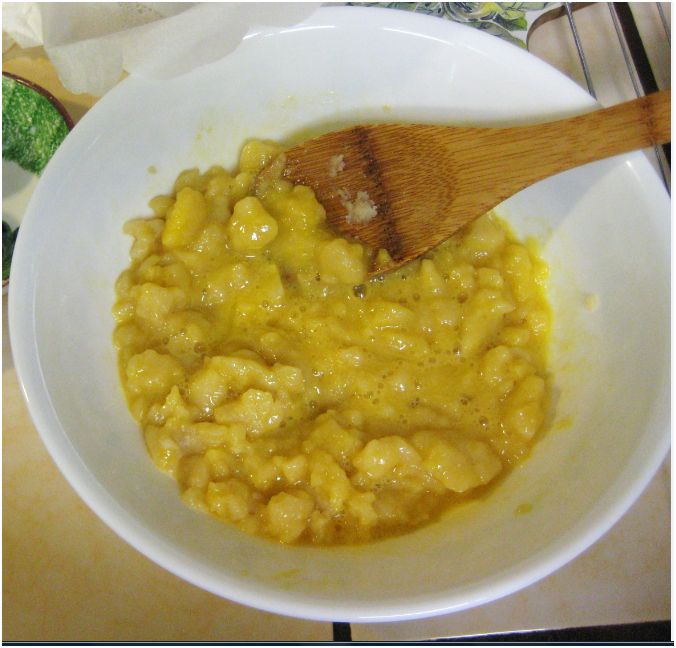
Souffle Time  |
| Pouring egg batter into lightly buttered & sugared ramekins. |
  |
| Pouring in the souffle batter. In & Out of oven. H2O added for heat stability. |
 |
| Final Souffle~! |
Brownies
 |
| Brownies with nuts & chocolate chips. |
 | ||
Chef packed us some for to-go.
|

Overall, it was really fun. It was more hands on experience than I anticipated, which was a big plus. At the end of the day, we learned to make sweet rolls (batter), spritz cookies, brownies, toffee/brittle, and souffle. Tricks and tips we learned:
1. Brittle: Add baking soda at the end of mixing the toffee mix.
2. Cleaning: To avoid muscling through pots/pans with sticky stuck sauces, pump some soap with water. Leave on low heat for about 10 minutes, then clean.
3. Sanitation: The chef reminded students during the cooking to never place hot pots or any pots on top of cutting boards.
Sunday, April 3, 2011
Pomegranate Spritzer
 |
| Complements almost any meal. Goes well with steak due to the tarty flavor. I like getting my pomegranate juice from directly from the farmer. The flavor is stronger, fresher, and overall tastier. I put 1/4 of this pom juice and mix with 3/4 mineral water. I used to be a water snob and had to drink a few bottles of Perrier a day. Trader Joe's sells a great substitute for a fraction of the cost. The pic shows a hand drink blender mixing 'em up to get the pom foam to arise on top. |
 |
| The colder you can keep these at, the better the spritzer foam will get. |
DOUP= Dumpling + Soup
 |
| Spin off of Keller's Chicken Dumpling Soup. Tasted like fusion. American + Asian + Mazto Ball |
 |
| Fresh veggies essential. That onion right there, it wasn't pretty inside...couple of peels ruined it for the rest. I don't like taking chances with iffy veggies, so a new onion came to sub in. |
 |
| Star carrot- easiest to make! |

 |
| I started to get an idea, that after I use a papaya peeler on carrots, the ridges could add to a design. |
 |
| Papaya peeler. I use those stringy carrots for Vietnamese Spring Rolls. |
 |
| Just dice on... |
 |
| Recipes that ask to throw a cup of this, that, that, and more... this is my sanity check cup. |
 |
| You'll see why later: First shape, triangle like during origami lesson. |
 |
| Fold it like so, then cut bottom tip. Trim around the top. |
 |
| Final product. |
 |
| Diced veggies. Star carrot looks cute! |
 |
| Here comes the parchment paper art! |
 |
| This light paper acts as a cover, but with a nice ventilation system for veggies to breathe and not get mushy. |
 |
| Yucks. I was really hoping this wasn't the end product. |
 |
More like it. |
 |
| Football Shaped Dumpling (No fillers) |
 |
| Dumplings swimming in small batches for better even cooking. |
 |
| The Chicken Broth Soup (Didn't feel like eating chicken meat). Would this constitute as a vegetarian? If there's chicken broth? OR Can this pass a Chicken [broth] Dumpling Soup? |
Hamburger
 | |||||
| I like to make my own beef patties. With sirloin, I add onions, bread crumbs, a tad bit of BBQ sauce for smokey flavor, salt. pepper, andddddd onion enzyme. The bread is Kaiser. It's a nice size with good texture for grilling slight butter on. Other bread option is Ezekiel bread type, for the more health conscious sorts. The toppings are caramelized onions in red wine with the magic onion enzyme juice again, grilled. I like this with American cheese (Tillamook) |
Steak Mushrooms
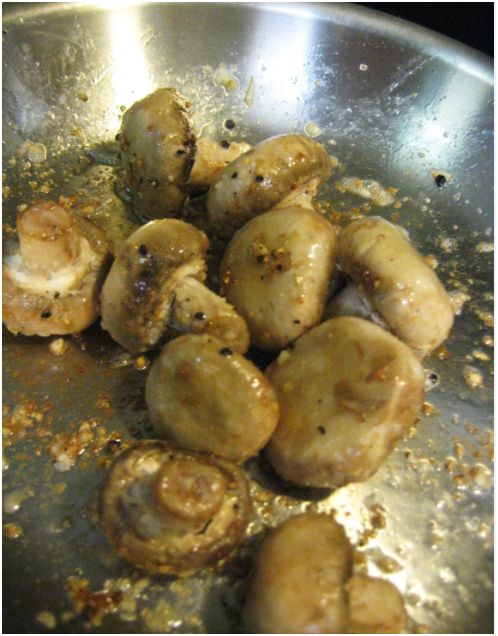 | |||
| I like simplicity when adding veggies to accompany a steak dinner. These mushrooms are regular white button mushrooms carefully washed. My mom actually liked these mushrooms more than the steak. Used an All Clad pan greased with butter/oil 50/50, add minced garlic, let whole mushrooms sit, add grated Parmesan cheese. Stir until cooked. Later added course pepper. No salt was added for this. |
Filet Mignon wrapped around with Bacon
 |
| In this dish, I did not use any salt/pepper/wine while cooking. Just natural flavors from the bacon and the filet's own flavor. One of best flavors I had. |
 |
| My parents happened to know a free-range cattle ranch family,who used grass and organic feeds. This doesn't happen all the time for us, but getting the freshest meats is well worth it. The way I like my meat is tender. Easy way is to leave out the meat in the fridge for 2-3 days before cooking. Our family always had frozen all meats ahead. If you use a freezer to store meat, try not to use the microwave to defrost. The texture will not come out as lean. |

HEAT: I started with high, mainly to sear the sides of the meat. After that, brought it back to low for 1.5 hours for slower cooking. Before serving, medium high to cook meat according to diner's preference.
Saturday, April 2, 2011
Southern Pan Fried Chicken
 |
| Can't believe there was no MSG...and for that I will do it all over over again. |
 |
1. After coating chicken, let them rest and have debris fall. (Prior to coating, chicken was marinated for 12 hours in brine. Not removing brine after 12 hours will leave very salty chicken.2. I usually deep fried, but Tom Keller advised pan frying 1/3. Some use the Dutch oven. I just used the All Clad pan for this. It did get sticky washing off the oils. I used peanut oil for higher heat resistance. Canola should also be just as fine. |
 |
3. Remove from heat to chill station. This is important for chickens to "rest" and is still cooking. I realized when I took my chicken out, it was not completely cooked. I set it aside for 10 minutes, and the heat within the chicken cooked it very juicy.Note: My chill station is easily made by any oven/toaster rack. Just leave paper towel or parchment paper under to absorb oil. |
Subscribe to:
Comments (Atom)